Sunday, November 15, 2009

Week 12: Raising the roof


In just 12 weeks we have walls and a roof. I never knew how fast these things could happen, but these guys are busy as bees. We have also been extremely fortunate with the unseasonably warm and beautiful weather, which is all the more amazing seeing as by this time last year we had already had a few winter storms and about 1 1/2 feet of snow on the ground. 

The first step this week was to get the roof trusses up and to close in the areas under the peak with plywood. It took about 2 days for all the trusses to be added.


Once the trusses were up, the roof became a hive of activity with many workers adding strapping to accept the steel cladding. I loved the fact that now that we have walls, the workers actually need to use the “doors” to enter the building.


The steel roofing arrived in sheets that needed to be drilled in preparation for affixing to the strapping. Once the metal was drilled, it got screwed down to the wood quite quickly.


It is amazing how much the roof transforms the structure. It can now be recognized as a building, rather than just a shell. Entering the space creates a completely different emotion in me. The roof gives substance to the entire process to date and is a major step towards completion.

Here you can see how the whole internal area has been defined with the addition of the roof. I can now visualize how the final space will look with the walls clad, lighting hanging, and machinery in place.

So we put up a roof and then cut a hole in it? It’s all for a good cause - this is the exit point for our new spray booth ventilation stack.

And here is our complete, beautiful roof! Hooray!

Saturday, November 7, 2009

Week 11: Show me some skin

After last week’s snow, we were a little concerned about what the weather had in store for us, but thankfully, the whole week was sunny and beautiful - perfect for more construction progress. The next project on the agenda was to skin the framing with plywood, which really helped to give the building’s skeleton a feeling of three-dimensionality.


In addition to the plywood on the walls, you can see how the floor joists for the office level have been installed. Plywood is then laid over top in preparation for installation of the concrete flooring.

Here is a view from our front vestibule, looking up at what will become our staircase to the office level.

Here is another view from the vestibule, looking toward the entrance to the workshop and beyond. I find it so enjoyable to see these spaces taking shape.

This image is taken inside the workshop from the northwest corner, just outside the utility room. You can see how almost all the walls have been completed.

And here is a view from outside the southwest corner at the end of the week. Next week – roof!

Sunday, November 1, 2009

Week 10: We’re framed!


Even though we got our first few teasing snowfalls this week (I suppose it is inevitable being in the snow belt), the framing started going up. We thought the foundation and floor were exciting, but this really makes us smile!


In just a couple of days, one side and the back were up. I love seeing the openings for the windows, as they make the abstract planes of these stick-frame walls more tangible. 


The new overhead door took shape with the positioning of the reinforcing i-beam across the top of the opening.

At the front of the building you can see our new concrete front stoop and the beginnings of the structure for our second floor office. The area sectioned off with the i-beams will be a new workshop area that has been created under the office level, a more efficient use of space.

While pouring the front door pad, they also poured a concrete slab for our new dust collector. Even though our old blue workhorse (seen in the background) survived the tornado hostilities, we will be adding a larger system to deal with the increased volume of our new machines. I will add some details of our recent additions soon.

At the end of the week we had walls! All the walls, aside from the second floor of the office (awaiting the floor joists) were up and ready for the next step.

Friday, October 23, 2009

Week 9: Smooth as a baby’s bottom (part 2) – definitely!


The beginning of the week brought good enough weather for the pouring of the concrete floor. It seems amazing to me that all the work of the previous week, the tubes, the mesh and the insulation, gets covered over with what now looks like a concrete skating rink.

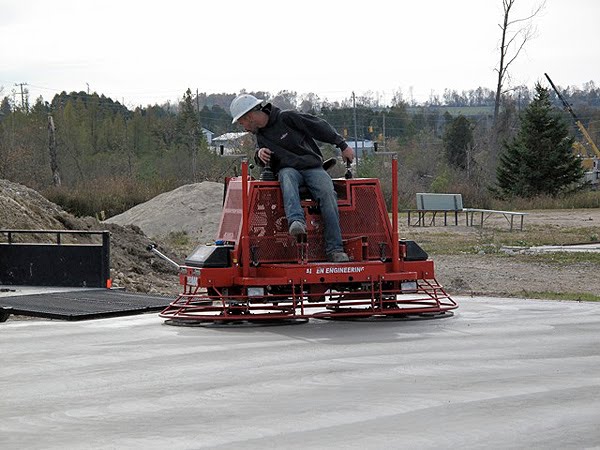
I thought these polishing machines looked like bumper-cars at a fairground. I wonder if they are fun to drive?


The surface is beautifully smooth with just a few reminders of the work below, such as the plumbing piping and heat manifolds.

The end of the week was wet and rainy and the workers took a break. The roof trusses and lumber for the walls was delivered, but looked lonely against the grey sky. We cross our fingers that next week’s weather will be more cooperative. 

Friday, October 16, 2009

Week 8: Hot, hot heat


The next step on the construction ladder was to lay the insulation and wire mesh for the new in-floor radiant heat system. This is one of the exciting changes we have been able to make to our workshop as a result of the whole tornado experience. One has limited options when heating a wood shop, due to concerns about dust, so radiant heat is the perfect solution. It is very energy efficient and will keep everything at a comfortable working temperature during our cold, snow-belt winters. Here are some images of the process.


Rigid foam insulation was laid onto the compacted soil surface of the new addition and directly onto the concrete of the old foundation. Next, a layer of thick wire mesh is added which will allow the piping to be anchored flat.

During this phase, the groundwork for the plumbing also needed to be completed before the final concrete floor was poured.

A portion of the old concrete foundation was removed to accommodate our new CNC router, which needs to have a special thickness of foundation underneath it to help limit any possible vibration. The construction crews cut out and lifted the section of concrete, insulated the hole, and then laid the heat piping so that it dipped down into the hole and out again.

The snaking grid of in-floor tubing is quite a sight over the entire surface of the foundation. Another check mark achieved on the construction to-do list!


Thursday, October 8, 2009

Week 7: Smooth as a baby’s bottom (part 1)…well, almost…

The next task was to lay insulation against the foundation walls and backfill the trenches.


The in-filled surface needed to be compacted and smoothed out as much as possible, to prepare for the next step – the laying of the concrete floor.

I know it does not look like much, but just seeing this smooth surface and knowing what is coming next, has made us so happy with our progress.


Friday, October 2, 2009

Week 6: Shaking the foundations


It has only been 6 weeks and the rebuilding has started! We are thrilled with the progress we are making. Now, if only Mother Nature will cooperate - I think she owes us one, don’t you? Please keep your fingers crossed for a dry autumn.

The first job was to get the ground excavated for the new addition and to have the footings poured, as well as some minor touch-ups to the old foundation. The excavators that took down the remainder of the old building were a little over-zealous at times.

The week started off with rain on Monday (very disheartening), but luckily Tuesday cleared up enough to start the work on the footings. The trenches were dug and the concrete forms created.


I was not sure how long this whole process would take, but in only three days the forms were coming off and the new foundation footings were complete!